Dreamy Graduation Celebration Brownies
Highlighted under: Holiday Food | Party Meals
I absolutely love celebrating accomplishments with something sweet, and these Dreamy Graduation Celebration Brownies are my go-to treat. The rich chocolate flavor combined with a hint of coffee makes them irresistible, and I can't get enough of how fudgy and decadent they are! I often personalize them with colorful sprinkles or a drizzle of frosting to match the graduation theme, making it a fun and festive addition to any celebration. Trust me, these brownies are sure to impress everyone at the party.
When I first made these brownies, I aimed for a recipe that would be both simple and showstopping for my friend's graduation. I experimented with different ingredients until I perfected the balance of rich chocolate and a soft, fudgy texture. The addition of coffee not only elevates the chocolate flavor but also enhances the overall depth and complexity, making each bite indulgent yet satisfying.
One key tip I learned is to underbake them slightly; this keeps them moist and gooey in the center, which is absolutely crucial for that dreamy experience. I enjoy pairing them with a scoop of vanilla ice cream for an even more decadent dessert that's perfect for celebrating achievements!
Why You'll Love This Recipe
- Rich chocolate flavor paired with a hint of coffee
- Fudgy texture that melts in your mouth
- Customizable with sprinkles or toppings for any occasion
The Secret to Fudgy Brownies
Achieving the perfect fudgy texture is key to these brownies, and it primarily hinges on the balance of fat to flour. The melted butter adds richness, while the combined use of cocoa powder and all-purpose flour ensures that the brownies remain moist and dense. It's important not to overmix after adding the flour; simply fold until you see no dry streaks. This gentle mixing technique helps retain that desirable fudgy quality instead of resulting in a cake-like texture.
For an enhanced chocolate experience, consider using high-quality cocoa powder and adding extra chocolate chips. The chips should be added at the end of the mixing stage, ensuring they don't fully melt into the batter, which allows for delightful pockets of melted chocolate within each bite. If you’re a chocolate lover like me, you might experiment with different types of chips, such as dark chocolate or semi-sweet, depending on your taste preferences.
Packaging for a Graduation Celebration
To make your brownies extra special for the graduation celebration, consider packaging them in a creative way. After they have cooled completely, you can cut them into neat squares and place them in a decorative box or arrange them on a serving platter. Adding a colorful ribbon around the box can elevate the presentation and tie in with the graduation theme. This thoughtful touch not only makes it visually appealing but also adds an impressive element to the dessert table.
As a fun addition, I often add a layer of colorful sprinkles or drizzle melted frosting over the top to match the school colors of the graduate. This not only enhances the visual impact but also adds a sweet crunch or an additional layer of flavor. Keep in mind that if you opt for frosting, letting the brownies cool completely before icing is essential to prevent melting and run-off.
Storage and Make-Ahead Tips
These brownies can easily be made ahead of time, which is perfect for busy graduation schedules. After baking, allow them to cool completely before storing. When properly wrapped in plastic wrap or placed in an airtight container, they will stay fresh for up to four days at room temperature. You can also refrigerate them for up to a week if you prefer a firmer texture, as chilling enhances their fudgy consistency even further.
For longer storage, consider freezing the brownies. Slice them into squares and freeze individually wrapped pieces in freezer bags. This way, they remain fresh for up to three months. When ready to enjoy, simply take out a portion and let them come to room temperature. Alternatively, you can microwave them for a few seconds for that warm, gooey effect, bringing the celebration back to life even after some time has passed.
Ingredients
Gather these ingredients:
Brownie Ingredients
- 1 cup unsalted butter, melted
- 2 cups granulated sugar
- 4 large eggs
- 1 teaspoon vanilla extract
- 1 cup all-purpose flour
- 1/2 cup unsweetened cocoa powder
- 1/4 teaspoon salt
- 1/4 teaspoon baking powder
- 1/2 cup chocolate chips (optional)
Now that you have all your ingredients, let's start baking!
Instructions
Follow these steps:
Preheat the Oven
Preheat your oven to 350°F (175°C) and grease a 9x13 inch baking pan.
Mix the Wet Ingredients
In a large bowl, mix together the melted butter and sugar until well combined. Add in the eggs one by one, followed by the vanilla extract.
Combine Dry Ingredients
In another bowl, whisk together the flour, cocoa powder, salt, and baking powder.
Combine & Add Chocolate Chips
Gradually fold the dry ingredients into the wet mixture until just combined. If using, fold in the chocolate chips at this stage.
Bake the Brownies
Pour the brownie batter into the prepared pan and spread it evenly. Bake in the preheated oven for 25–30 minutes. Remember, it's better to underbake than overbake!
Cool and Serve
Allow the brownies to cool in the pan for about 10 minutes before slicing into squares. Enjoy!
Dig in and enjoy your dreamy brownies!
Pro Tips
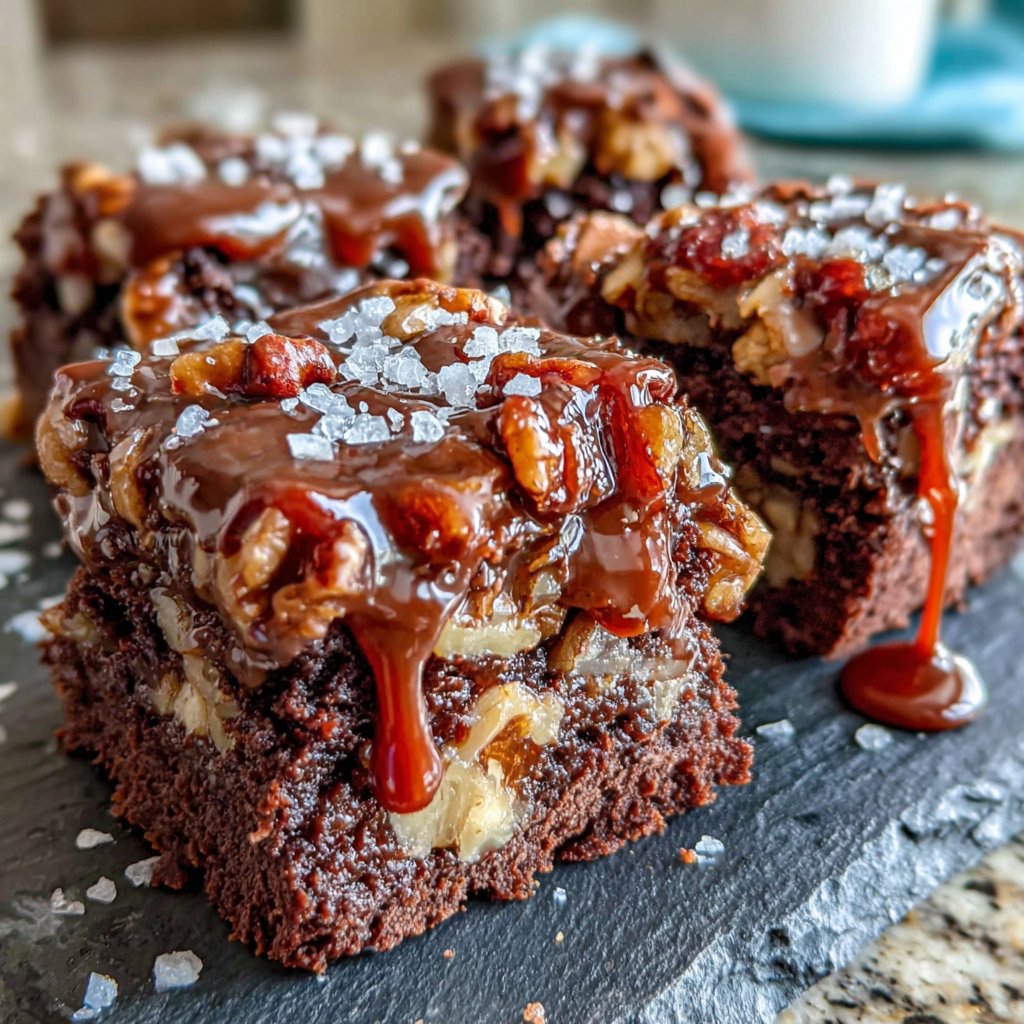
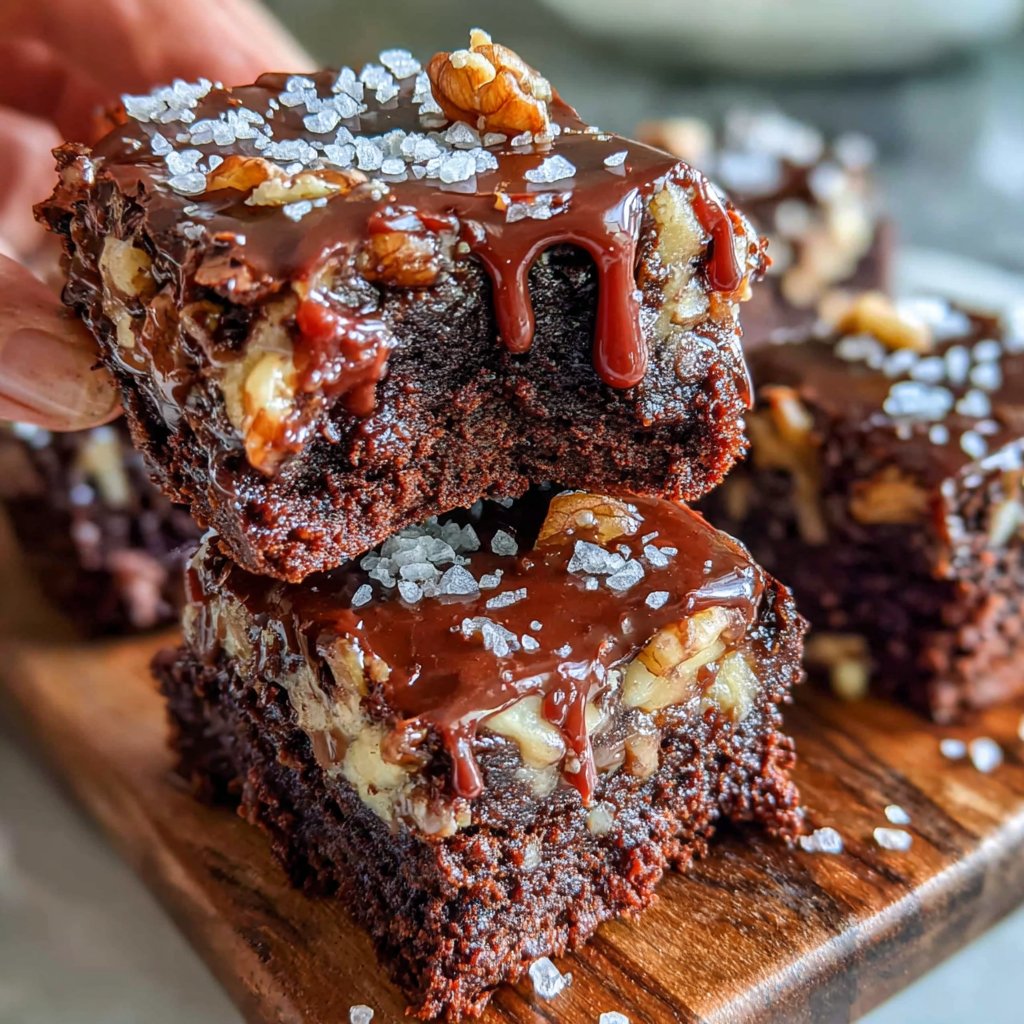
- For an extra touch, serve with a scoop of ice cream or drizzle with caramel sauce. You can also sprinkle some sea salt on top before baking for a delicious contrast!
Troubleshooting Common Issues
If your brownies turn out too dry, it may be due to overbaking. Keep a close eye on them as they approach the 25-minute mark. To check for doneness, insert a toothpick in the center; it should come out with a few moist crumbs attached, indicating they are perfectly fudgy. If you accidentally overbake, consider using a bit of frosting or serve with a scoop of ice cream to add moisture back into the dessert.
On the other hand, if the brownies are too gooey and undercooked, they simply need more time in the oven. You can cover them loosely with foil and return them to the oven for an additional 5-10 minutes. However, always err on the side of caution to prevent them from becoming too cake-like. Aim for that glossy top with just the right amount of wiggle when you initially take them out.
Personalizing Your Brownies
Customization is part of the fun, especially for a graduation celebration! Feel free to mix in various nuts like walnuts or pecans for added texture and flavor. You can also sprinkle some sea salt on top before baking to balance the sweetness with a slight savory kick. Not only do these additions enhance the taste, but they also add delightful contrast to the decadent chocolate base.
For a flavorful twist, experiment with the addition of espresso powder to the batter, which elevates the chocolate flavor wonderfully without adding a distinct coffee taste. Just a teaspoon will do! This ingredient is particularly fitting since the hint of coffee can complement the celebratory spirit of graduation, making your brownies truly stand out.
Serving Suggestions
When serving these brownies, I love to pair them with a scoop of vanilla ice cream or a dollop of whipped cream. This creates a delightful contrast in temperature and texture, enhancing the overall dessert experience. If you're feeling adventurous, drizzle some caramel or chocolate sauce over the top for that extra special touch. Garnishing with fresh fruit like strawberries or raspberries not only adds color but also freshens up the flavors beautifully.
Introduce a bit of fun by serving them in mini cupcake liners, allowing guests to grab their portions easily. This also makes cleanup a breeze and presents the brownies in a charming, festive manner, perfect for graduation parties. Remember to keep a napkin handy, as I promise everyone will be coming back for seconds!
Questions About Recipes
→ Can I use dark chocolate instead of cocoa powder?
Yes, you can substitute dark chocolate for cocoa powder and adjust the sugar accordingly.
→ How should I store the brownies?
Store them in an airtight container at room temperature for up to 5 days.
→ Can I freeze these brownies?
Absolutely! Wrap them individually and freeze for up to 3 months. Thaw before serving.
→ What can I add to the brownies for extra flavor?
You can mix in nuts, peanut butter, or even espresso powder for an enhanced flavor.
Dreamy Graduation Celebration Brownies
Created by: The Chefericcooks Team
Recipe Type: Holiday Food | Party Meals
Skill Level: Intermediate
Final Quantity: 12 servings
What You'll Need
Brownie Ingredients
- 1 cup unsalted butter, melted
- 2 cups granulated sugar
- 4 large eggs
- 1 teaspoon vanilla extract
- 1 cup all-purpose flour
- 1/2 cup unsweetened cocoa powder
- 1/4 teaspoon salt
- 1/4 teaspoon baking powder
- 1/2 cup chocolate chips (optional)
How-To Steps
Preheat your oven to 350°F (175°C) and grease a 9x13 inch baking pan.
In a large bowl, mix together the melted butter and sugar until well combined. Add in the eggs one by one, followed by the vanilla extract.
In another bowl, whisk together the flour, cocoa powder, salt, and baking powder.
Gradually fold the dry ingredients into the wet mixture until just combined. If using, fold in the chocolate chips at this stage.
Pour the brownie batter into the prepared pan and spread it evenly. Bake in the preheated oven for 25–30 minutes. Remember, it's better to underbake than overbake!
Allow the brownies to cool in the pan for about 10 minutes before slicing into squares. Enjoy!
Extra Tips
- For an extra touch, serve with a scoop of ice cream or drizzle with caramel sauce. You can also sprinkle some sea salt on top before baking for a delicious contrast!
Nutritional Breakdown (Per Serving)
- Calories: 380 kcal
- Total Fat: 26g
- Saturated Fat: 15g
- Cholesterol: 195mg
- Sodium: 85mg
- Total Carbohydrates: 32g
- Dietary Fiber: 3g
- Sugars: 24g
- Protein: 6g